

SHOP THIS POST
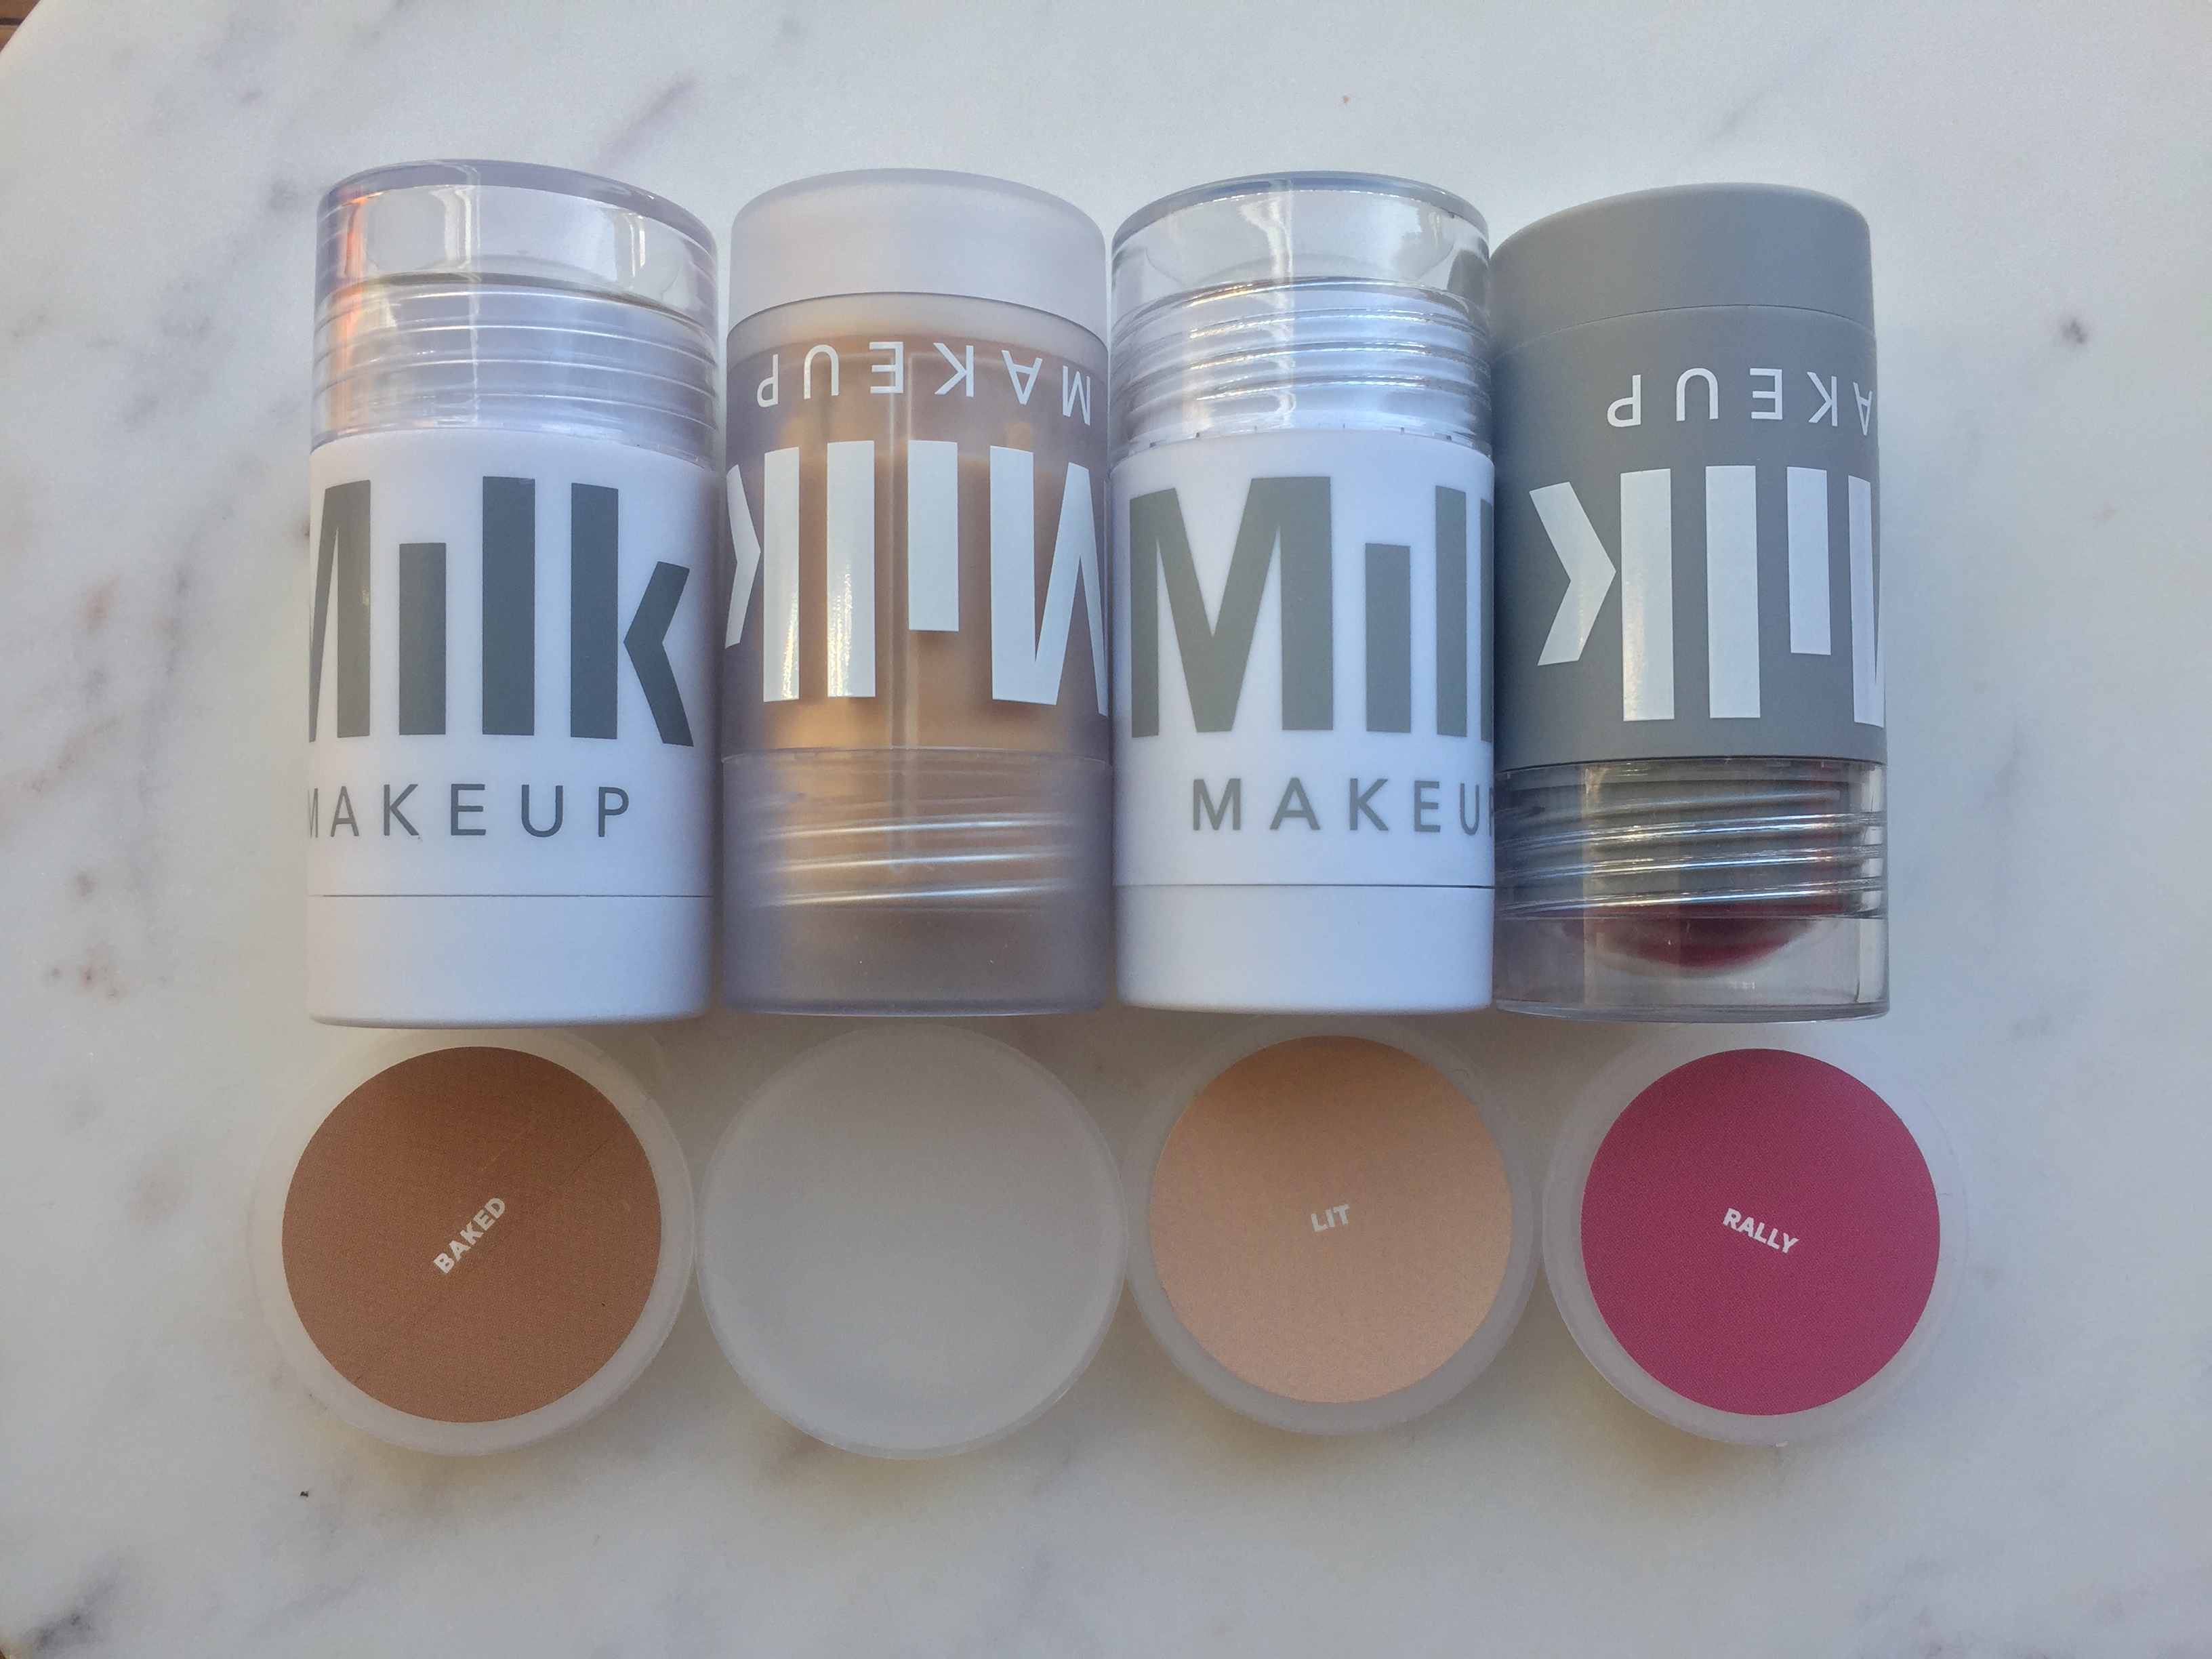
I was recently able to get my hands on a few of the products from the hip and rather hyped-up US makeup brand, Milk Makeup. Selecting which products to get my mitts on first was a definitely a challenge (if only money was no object) but I managed to narrow it down to four: the Blur Stick, a matte primer; the Matte Bronzer; the Lip + Cheek, a multi-use tint, and the Highlighter.
These particular four face products come in fun, chubby style, twist-up stick packaging which means that they are not only practical to carry around on the go but they can also be applied directly onto the face without the need for any makeup brushes or tools. The only slightly annoying feature is the double cap but I assume that the inner cap is to further protect the product and possibly stop it from drying out? So yes, you have to remove the main outer cap, then the inner cap before you get to the product. If you’re on the go, this can be annoying and I wouldn’t be surprised if one or both goes AWOL especially as they are both clear.
Blur Stick
The Blur Stick, I feel, is the product that has had most of the hype surrounding it. For that reason, I had to include it in my list of products to try first. Described as a ‘universal face filter’, it claims to ‘blur pores and fine lines’ and is a silicone-free, oil-free and non-comedogenic formula. I was quite surprised to find that it was silicone-free as it does have that similar slippy-ness to it. Whilst it does do the job of mattifying the skin which I greatly appreciate for my hyperactive t-zone, and somewhat reduces the appearance of pores, I didn’t feel like it does anything more than any other silicone-based primer. Of course, if you have an aversion to silicone then this certainly may be a good alternative but for me, silicone has never been an issue as I don’t find it clogs my pores or make my skin react adversely. Also, it retails for a whopping $36 which is the most expensive product of the four I purchased.
Matte Bronzer
The Matte Bronzer comes in two shades: Baked and Blaze, with Baked being the lighter of the two. Admittedly at the time of purchase, I was not actually aware that there were two shades and I ended up picking Baked, a warm, mid tone brown. Knowing me though, had I had known there were two shades, I would have probably opted for the darker shade Blaze.
Packed with mango butter, coconut oil and avocado oil, the formula is super emollient, making for a beautiful, hydrating finish on the skin. My initial thought upon first swipe was that it was very pigmented but this was short-lived as I proceeded to blend it out with my fingers. The bronzer, whilst super easy to blend, when blended out is very, VERY sheer. Much sheerer than I would like and normally wear. However, it does layer well (with a bit of patience – more on that later) so if you want more pigment, you simply apply more and for me, it’s usually tonnes more. Because of the formula, this finish sits naturally on the skin to give off a lovely sun-kissed glow. I think that is the beauty of cream products though, you don’t ever see the tale-tale, talcy finish that you often get with a lot of powder products (although formulations have improved vastly over the years).
Due to its sheer finish, I thought I would experiment with different tools to see if I could achieve a different level of pigment. I found that using a damp sponge like the Real Techniques Miracle Complexion Sponge created an even sheerer finish, probably because the sponge absorbs some of the product and/or the water thins out the product. However, using a dense makeup brush like the Real Techniques Expert Face Brush actually allows you to build the pigment up rather quickly and helps to retain the pigment more as opposed to sheer it out completely. For me, the brush option is the winner.
One thing worth noting though, it does leave an ever so slightly tacky finish on the skin meaning that it can be prone to smearing. I mostly wear my hair down and on a few occasions, I’ve found that my hair would brush up against my cheek and inadvertently pick up some product in the process. This would leave behind patchiness and hair strand imprints. Frankly, I’m not down with that. For this reason, I would highly recommend setting with a fine powder (I like the Laura Mercier Translucent Loose Setting Powder), just a light dusting, so that you still retain that fresh, non-powdery look. Also, layering the product can take, and test your, patience. The product is prone to lifting so you’ll need to take the time to ensure that any patchiness is evened out. The matte bronzer retails for $24.
Lip + Cheek
The Lip + Cheek is available in four shades: Perk, a coral; Rally, a mauve; Swish, a blue-toned pink, and Quickie, a berry. Of the four, I was most drawn to Rally as some of my favourite blushes (Nars Sin and Mac Mocha) are mauve toned blushes that really work well on my skin tone. Not going to lie though, I was rather intimidated by how dark the colour looked in the packaging. Like with the Matte Bronzer, it’s a blend of hydrating butter and oils so it has the same, emollient texture. And just like the Matte Bronzer (thankfully), the Lip + Cheek blends and sheers out effortlessly. Whilst I like my bronzer quite visible, I prefer my blush to appear as a natural, subtle flush of colour.
As with the Matte Bronzer, when trying to build up the pigment, I have found layering the Lip+Cheek on top of the Matte Bronzer a little tricky. As mentioned above, layering one product on top of the other causes the product underneath to ‘lift’. This can lead to patchiness in the application. This issue can be alleviated but you have to take the time to manipulate the product to even it out and resolve any patchy issues. Probably not one for when you’re short on time.
Whilst this product works nicely for that natural, rosy flush of youth on the cheeks, I am not entirely convinced about its function on the lips. Whilst it leaves behind a nice tint to the lip that passes off as a subtle, effortless stain, I don’t find it to be hydrating at all. It almost has that superficial feel to it (vaseline anyone?) where it has a nice slip on the surface but beneath that, there’s not that much to it. I thought that with the encapsulated oils, it might do something a bit more for dry lips. Evidently not. The Lip+ Cheek retails for $24.
Highlighter
The Highlighter comes in one universal shade, Lit, and is a warm, golden tone with an ever so slight, ‘blink-and-you’ll-miss-it’ hint of peachiness to it for that ‘radiant glow that flatters all skin tones’. It’s not too light or too dark and for my warm, light to medium skin tone, it’s right on point. I was definitely on the hunt for a good cream/liquid highlighter as I find them much more suitable for everyday wear for that soft, natural glow, and this highlighter doesn’t disappoint. As with the Matte Bronzer and the Lip+ Cheek (although not quite as emollient in texture), it’s mango butter, avocado oil and coconut oil fusion work beautifully on the skin. However, I prefer to apply this by swiping the product on my middle finger and then dabbing it straight onto the desired areas (namely the tops of the cheekbone, brow bone and above the arch of the brow). The subtle, almost ‘wet-look’ sheen that it gives off is just what I am looking for and looks incredibly natural. This isn’t a highlighter for those that like an intense, shimmery, ‘see-it-from-space’ glow. Definitely not. But for those that want something to subtly enhance the high-points of their face and that is pretty undetectable even in the harsh daylight sun, then this is something worth considering. The highlighter retails for $24.
Conclusion
So that is my overall thoughts of the four Milk Makeup products I’ve picked up. Of the four, I’ve thoroughly enjoyed using them all bar the Blur Stick. This really isn’t worth the hype nor the price. I do think it’s worth mentioning though, I don’t find the products to be quick and easy as the marketing makes them out to be. I find that with these cream products, it takes much longer to blend out particularly as these products are rather sheer, you need to repeatedly build it up and blend it out until you get to the level of pigment desired, which for me, is much more than the payoff upon initial application. Much More. Sure it would probably work for someone who wants very little colour and likes the sheer coverage but still, if you want that seamless blend between the products like I do, it takes time to ensure that all the edges of smoothed out and blended out so that you can’t detect where one product ends and the other finishes. And that’s not mentioning the issue with the product lifting when you try to build and layer it. Personally, I find powder products much, MUCH quicker to apply and therefore works great when on the go. I guess with the Milk Makeup products is that it is designed to be used without the need for brushes or tools so that’s fewer things to carry around if you’re in a hurry but as mentioned, I’ve found that I much prefer using them with a brush anyway, particularly the Matte Bronzer. I also find that applying it with fingers can get a little messy. Having said that, the cream formula gives off the most natural finish and is perfect for undetectable, low-key or even ‘no-makeup’ makeup days.
I’ve got my eye on the eye pigments next. Have you tried Milk Makeup? What are your thoughts?