Winged Eyeliner & Matte, Red Lips Makeup Tutorial

I’m not one for wearing a dramatic winged liner as I don’t particularly think it suits me, but I will dabble in a little kitten flick now and again. However, the look I’ve done in this video is just a tad more than a kitten flick and I’ve kept the eye makeup pretty neutral to let the liner do all the talking. Like my last video, I’ve teamed it with a bold lip but this time it’s a matte red. Enough babbling now, hope you enjoy the video!

Here’s a transcript of the video if you’re interested. If not, all the products are listed in the description box under the video.

Hi Guys, today Im going to show you how to create the winged eyeliner look teamed with a bold matte red lip. so all you need to do is make yourself a nice cup of tea, put your feet up and press play!
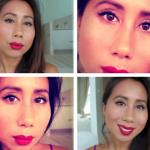
For my base, I’m using Makeup Forever HD Invisible Cover Foundation and I’m in the shade 128 and I’m using my damp Beauty Blender and bouncing it all over my face for a natural finish.
For my brows, I start with combing through them first before going in with the Hourglass Arch Brow Sculpting Pencil, following the natural shape of my brow to give them a bit more fullness and definition
To set them in place, I use a clear brow gel on top and the one I swear by is the Collection Colour Lash Mascara. 
Now moving onto the eyes, I start off with applying a little bit of the Benefit Stay Don’t Stray Put! to provide a nice, even base for the shadow to stick on to.
Then going in with my Mac 217 blending brush, I’m applying a neutral shade to the lids not too far off from my natural skin colour (the one I’m using is Mac Patina). This helps to make the look a little more polished but the main focus will be on the winged liner.
For the liner, I’m using the Loreal Superliner Perfect Slim Black. I tend to look downwards when applying and extend from the end of the top lash line up and out, in line with the end of the brow but not extending it past the crease.
I then pull the line back on itself in small gradual motions, tightly along the lash line and really thinning it out to nothing as I reach the middle of my iris.
By using small feathering motions I find that this technique works to provide a neat and precise line and flick. I always have a cotton bud nearby to clean up any errors or smudges, as you can see I’ve come across too thick rather than thinning it out to nothing.
Then I curl my lashes with my Shu Uemura eyelash curlers.
Time for mascara and I’m using Maybelline Colossal Volume Express Waterproof Mascara. I tend to apply two to three coats for really big, stand out lashes and then a single coat for my bottom lashes
To make my lashes look even more fuller, I’m tight lining my upper inner lash line with Barry M Bold Black Waterproof Eyeliner.
To remove any clumps and to separate my lashes for a much more natural flutter, I like to comb through it with a lash comb and I find that the Tweezerman Folding iLash Comb does a brilliant job.
To brighten up the under eye area, I’m using Clinque’s Airbrush Concealer in 03 Light. I apply it straight to the under eye area in a kind if upside down V shape and I use my clean finger to tap and blend in the concealer. I find that the warmth of my fingers blends the product in really well.
In an attempt  to cover up the hideous spot on my forehead I’m using my Nars Radiant Creamy Concealer in the shade Ginger and applying it straight onto the spot and the using my finger to blend out the edges of the concealer so that it blends in with the rest of my forehead.
Then I’m taking the same concealer and applying it over some redness, scars and broken capillaries and blending it out with the Zoeva 142 Concealer Buffer Brush.
To set my makeup and prevent shine, I’m applying Mac Mineralize Skin Finish Natural in Medium Dark with a Zoeva 105 Luxe Highlight Brush under the eyes and down my t-zone
To contour, I’m using the bronzer in the Sephora Microsmooth Baked Trio palette. This will help to carve out my cheekbones, define along my jawline and make my face look a tad slimmer. I’m applying it with the Zoeva 127 Luxe Sheer Cheek Brush.
Then I take any excess product from the brush and run it along each side of my nose just to define it and make it appear a little more slimmer than it is.
Then for a natural flush of colour on the cheeks, I’m applying the Nars Blush in Deep Throat by the mini Nars Blush Brush.
To highlight the tops of my cheek bones and my brow bone, I’m applying Benefit’s Watt’s Up with my fingers and blending it out using small patting motions. I think this looks beautiful when it catches the light and not too obvious.
The finally the lips. I’m using the Sephora Lip Cream Stain in the shade Strawberry Kissed. This is a matte liquid lipstick and applies pretty easy but can get a little messy so a little goes a long way.
 I apply it to the bottom lip first before puckering my lips so the excess product transfers onto the top lip. Then I just follow the contours of my lips and apply enough so I have an all over even coverage.
For a really polished look, I like to clean up around the lips so you get that really crisp definition and also hide any lipstick that may have smudge outside of the lip line.
So that’s it. A classic winged eye with a bold, matte red lip look. I hope you’ve enjoyed watching.
I would love if you can gave me a thumbs up and subscribe so you don’t miss any of my future videos. bye
(Visited 278 times, 1 visits today)

You may also like...

Leave a Reply

Your email address will not be published. Required fields are marked *